Homemade Almond Milk
on Aug 05, 2019, Updated Jul 25, 2024
This post may contain affiliate links.
Have you ever wanted to try homemade almond milk? In this post, we’ll go through how to make almond milk for a delicious, creamy, healthy alternative to dairy milk and store-bought nut milk.
As an alternative to almond milk, you can also try my homemade hemp milk or homemade oat milk recipes.
Equipment Needed For Almond Milk
Blender
As long as your soak your nuts first, any decent blender will work for making almond milk. I love my Vitamix but I’ve also used a Ninja blender with success. Blendtec would also be suitable and Kitchenaid has some powerful models as well.
Bowl for Soaking
I like to use a glass mixing bowl or large glass measuring cup for soaking the almonds. You don’t need anything too large unless you’re making multiple batches at once.
Strainer
After you soak the almonds, you’ll want to strain them and give them a good rinse. Any strainer or mesh sieve works for this.
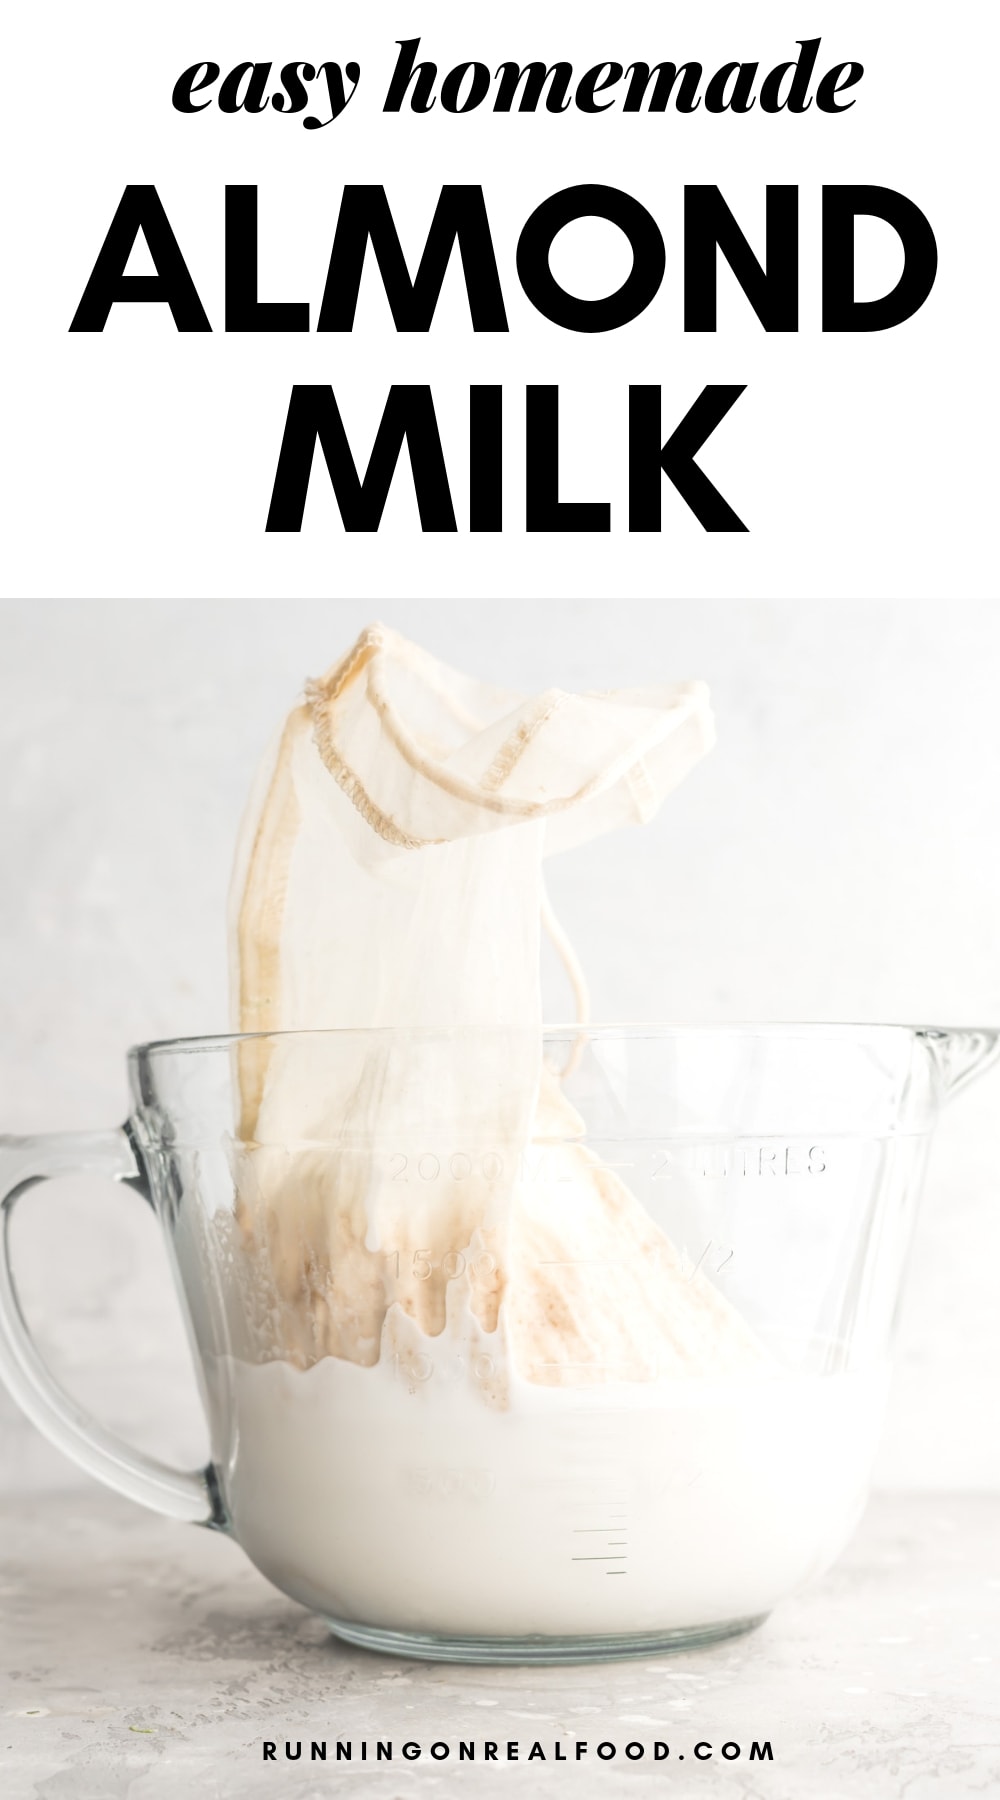
Nut milk bag or cheesecloth
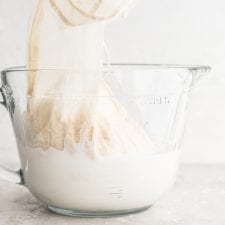
Although you can use cheesecloth or even an old cut up t-shirt, I’d recommend using a nut milk bag for straining the finished almond milk. Using a nut milk bag is the most convenient way to strain your blended almond milk for a smooth and creamy finished product. Nut milk bags are inexpensive and last forever.
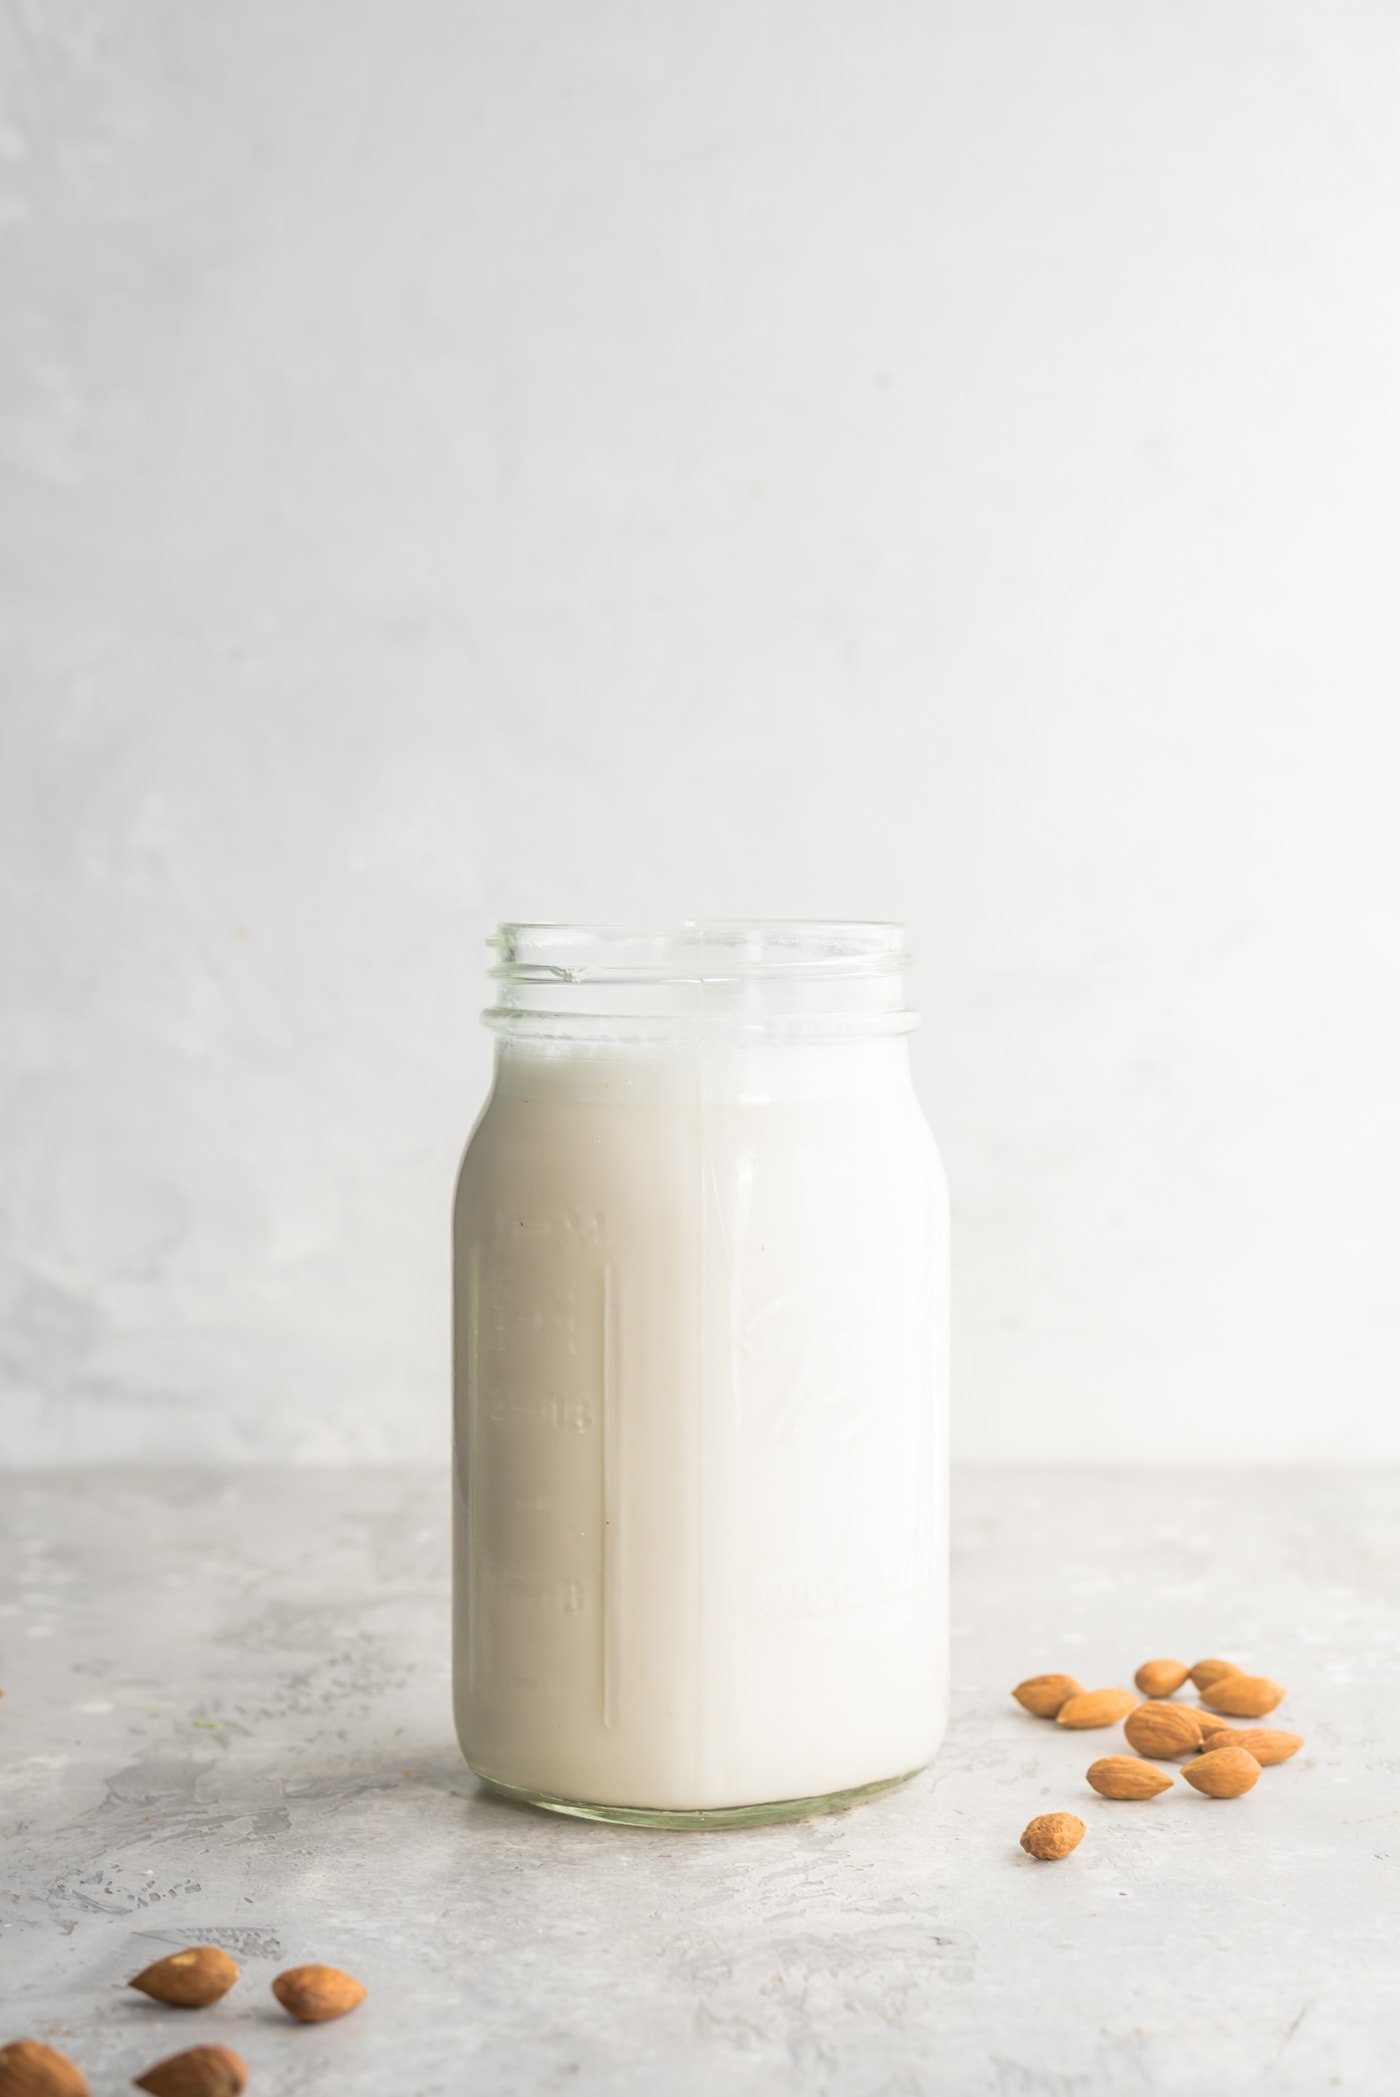
Jar for storing
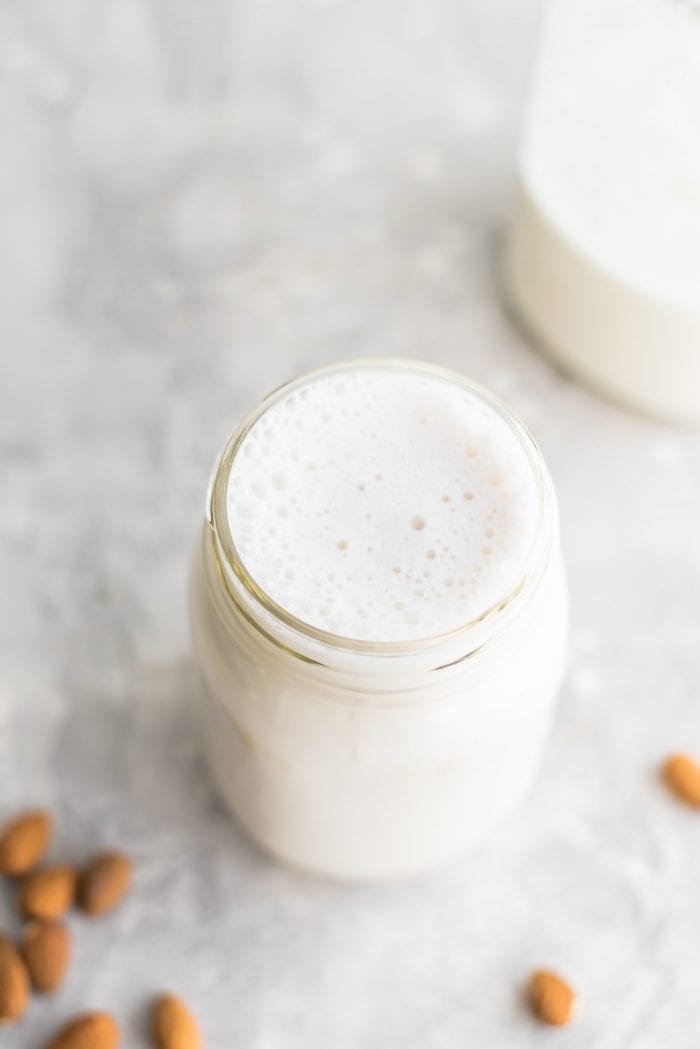
You’ll need some kind of jar or bottle for storing your homemade almond milk. I use a 1-quart mason jar with a plastic lid. Any glass bottle, jar or container works, preferably something that’s easy to pour out of.
How to Make Almond Milk
Making almond milk at home is quite easy and well-worth any effort that is involved. All you need to make it is almonds and water.
From there you can play with additions such as medjool dates for sweetness, a pinch of sea salt and pure vanilla extract for more flavour.
Step One: Soak
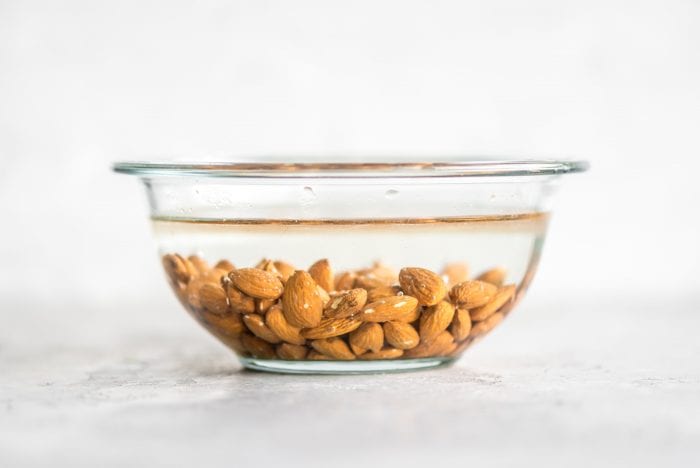
Soak raw almonds anywhere from 8-24 hours.
Step Two: Drain and Rinse
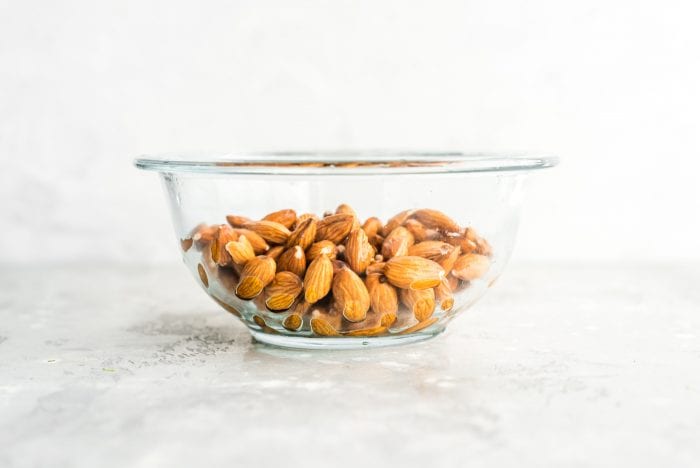
Drain and rinse the soaked almonds.
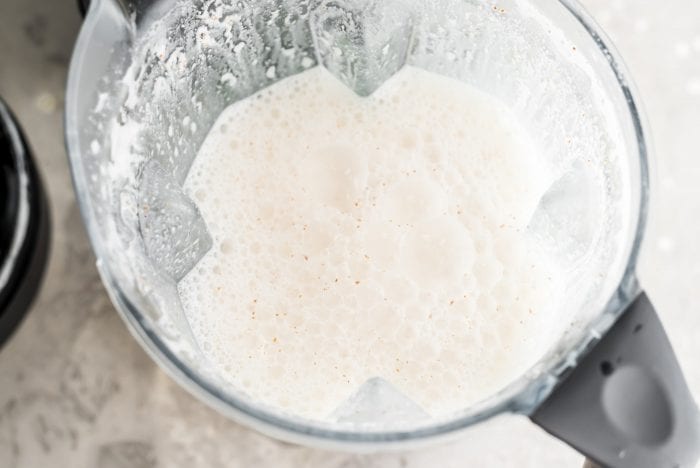
Step Three: Blend with Water
Add the rinsed, soaked almonds to a blender with 3-4 cups of water. When you first make your almond milk, start with 3 cups and see how you like the consistency then adjust as needed from there. I use 4 cups for mine.
Blend the almonds and water on high for up to 60 seconds until smooth and creamy.
Step Four: Strain
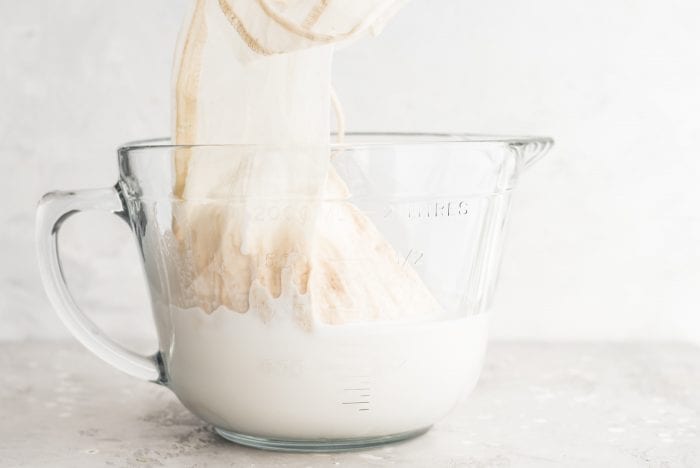
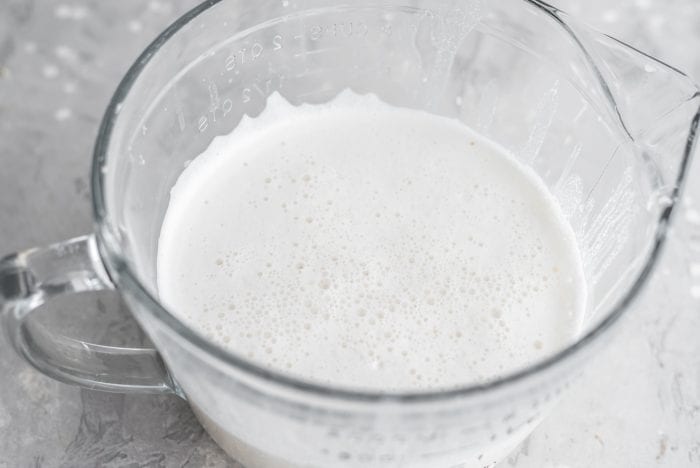
Strain the milk through a nut milk bag or cheesecloth into a jar or large measuring cup you’ll be able to pour into a storage container after straining. If you strain it into a bowl you can use a funnel to pour it into a storage jar after.
Uses
Homemade almond milk is smooth, creamy, delicious and far superior to store-bought milk. Here are the ways I love to use it:
- frothed and used to top coffee for homemade lattes
- as a coffee creamer (try making it with less water for a creamier consistency)
- as a base for smoothies
- to make stovetop oatmeal and overnight oats
- to make chia seed pudding
- with cereal or granola
- to make golden milk
- in vegan bulletproof coffee
- for drinking
FAQs
My almond milk separated! Has it gone bad?
Nope. Separated almond milk has not gone bad and is totally okay to use. Almond milk separates naturally but it’s no big deal, just give it a good shake before using. Store-bought almond milk has stabilizers and emulsifiers added that make it shelf stable, they’ll still separate but it happens much more slowly. Homemade almond milk will separate quite quickly once stored in the fridge.
Is it cheaper to make your own almond milk?
Yes and no, but overall the prices are comparable. It depends on the cost of almonds and store-bought almond milk in your area. For me, here in Vancouver, it costs me a little bit less to make homemade almond milk than buy it at the store. Regardless of the cost though, homemade almond milk tastes far superior to carton almond milk. In addition, you can feel confident knowing that your homemade milk is made with just 1 natural ingredient and contains no gums, carrageenan, preservatives or added flavours.
That being said, I still buy Silk Almond Milk weekly. My husband and I go through quite a bit making smoothies and although making my own is quite easy, it’s not always practical to be making it that often. It depends on what you plan to use almond milk for. We mainly use it in smoothies, which store-bought is fine for.
For a very inexpensive homemade plant milk, I’d suggest oat milk which requires just 1 cup of rolled oats per 3-4 cups of water and is very easy to make.
What kind of almonds should I use for making almond milk?
I would recommend organic, raw almonds. If organic ones aren’t an option, raw almonds are the next best choice. I would not recommend using roasted almonds since they often have added oil and salt.
How do you sweeten almond milk?
You can use maple syrup, medjool dates or raw honey to sweeten your almond milk. I usually just leave it plain but it’s up to you and again, depends on what you’re using it for. If you like to enjoy almond milk as a beverage on its own or in your coffee, a bit of sweetness is a nice addition and I’d recommend adding 1-2 medjool dates to the blender with the soaked almonds.
How do you flavor almond milk?
You can add pretty much anything to your blender with the soaked almonds to create different almond milk flavors. I’d recommend keeping it simple to start though and trying a dash of pure vanilla extract and a pinch of sea salt.
How do you make chocolate almond milk?
Easy, just add 1-2 tbsp of cacao powder, a couple soft medjool dates and a pinch of salt to the blender with the soaked almonds and proceed with the recipe.
How long does homemade almond milk last?
You can store homemade almond milk in the fridge for up to 4 days. It’s best enjoyed within a couple days though so I wouldn’t recommend making more than you’ll be able to use in that time.
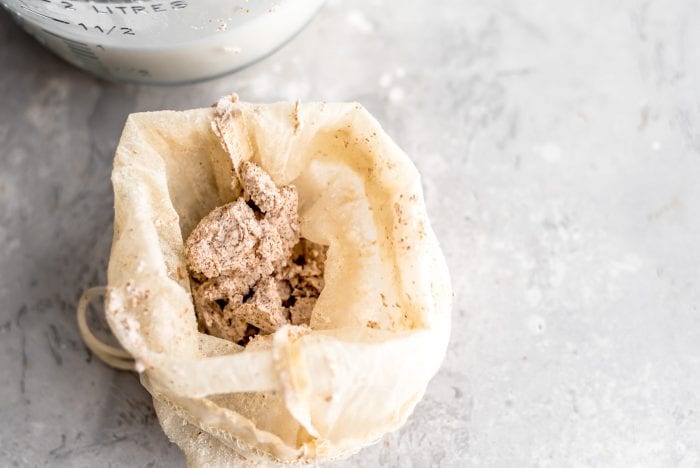
What do I with leftover almond pulp?
After you run the almond milk through your nut milk bag you’ll be left with a dry, flour-like almond pulp. You can discard this or use it in baking such as cookies, in no-bake bar and ball recipes, in homemade granola, you can add it to smoothies or oatmeal, sprinkle it on coconut yogurt or mix it into chia pudding.
How to Make Almond Milk
Ingredients
- 1 cup raw almonds
- 4 cups filtered water, filtered water is not necessary but may help extend shelf-life
- pinch of sea salt, approx. 1/4-1/2 tsp
- 1 tsp vanilla, optional
- 1 tbsp maple syrup or 1-2 medjool dates, optional
Instructions
- Soak the almonds in water in a glass bowl for 8-24 hours.
- When the almonds have finished soaking, strain (discard the water they soaked in) and rinse well.
- Add the rinsed, soaked almonds, salt and water to a high-speed blender. Add the dates and vanilla if using.
- Blend on high for 60 seconds until smooth, creamy and frothy.
- Either pour right into a container for storing or strain through a nut milk bag for smooth, creamy homemade almond milk. The leftover almond meal can be discarded or used in baking, oatmeal or to make granola. I like to strain it into a glass measuring cup and then pour it into my storage container after straining. My large measuring cup has a spout so it's easy to pour from. If you strain into a bowl, a funnel will make it easier to pour into a storage jar.
- Store in the refrigerator for up to 4 days. Shake well before each use.
Notes
Nutrition
This recipe was originally published on January 27, 2013.


Can you use regular roasted almonds?
I’ve never used roasted almonds to make almond milk but you can, yes.
Can it be frozen?
Yes, you can freeze almond milk up to 6 months in a freezer-safe container. Thaw in the fridge. Note that natural separation will occur so shake well before use.
After making the milk and storing in the fridge over night it looks like mine is separated? White cap on the top and basically water on the bottom. Is this normal or what do I do to fix it!
That’s totally normal, don’t worry. Just shake well before using again.
Any ideas on natural preservatives? I would like to make my milk in bulk and store it longer than 4 days.
Not that I can think but these few tips may help it last up to 7 days – 1. blanching the almonds before soaking, 2. soak in the fridge, 3. using filtered water, 4. using 1/2 tsp salt and 1 tbsp honey or maple syrup. This may extend the shelf-life but be sure to monitor for any smell or discolouration and discard if so. Also be sure to have it out of the fridge for as little time possible ie., don’t leave it sitting on the counter while you prepare a smoothie, coffee, etc.
When soaking almonds overnight do I need to put in the fridge or left out?
Room temperature is fine.
I followed your recipe and my milk came out delicious. Thank you.