Homemade Butterfingers (No Candy Corn)
on May 24, 2023, Updated May 06, 2026
This post may contain affiliate links.
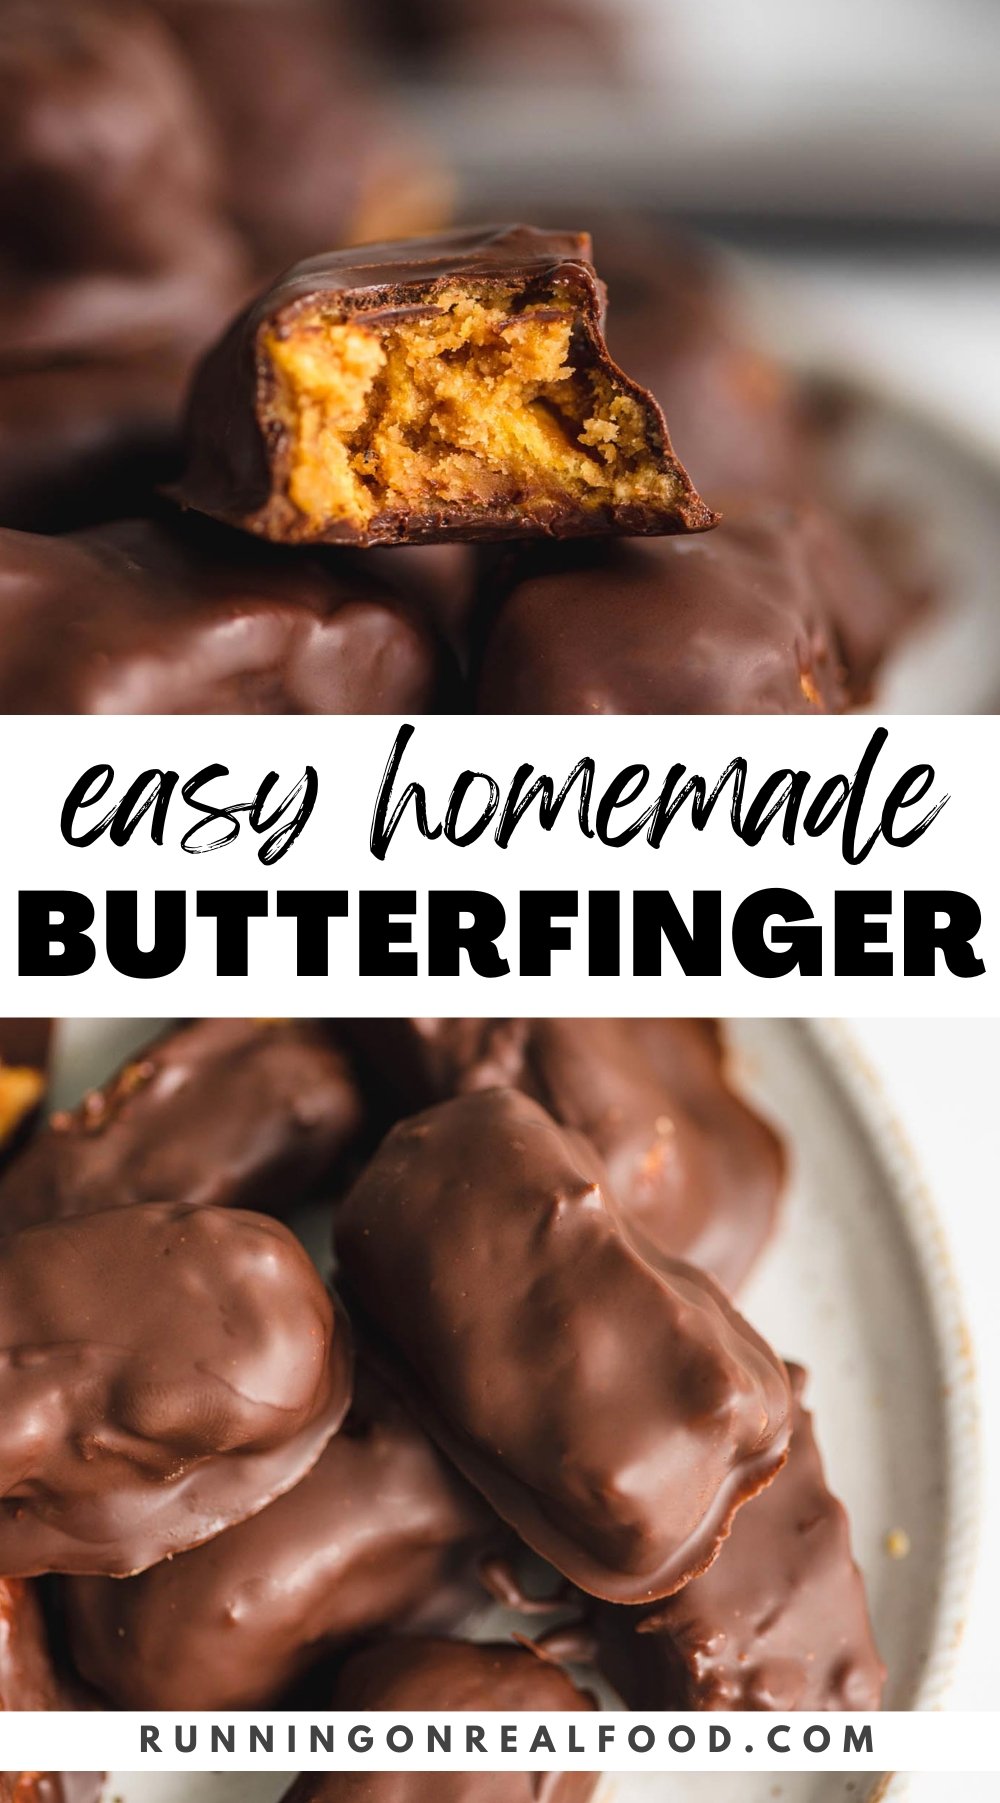
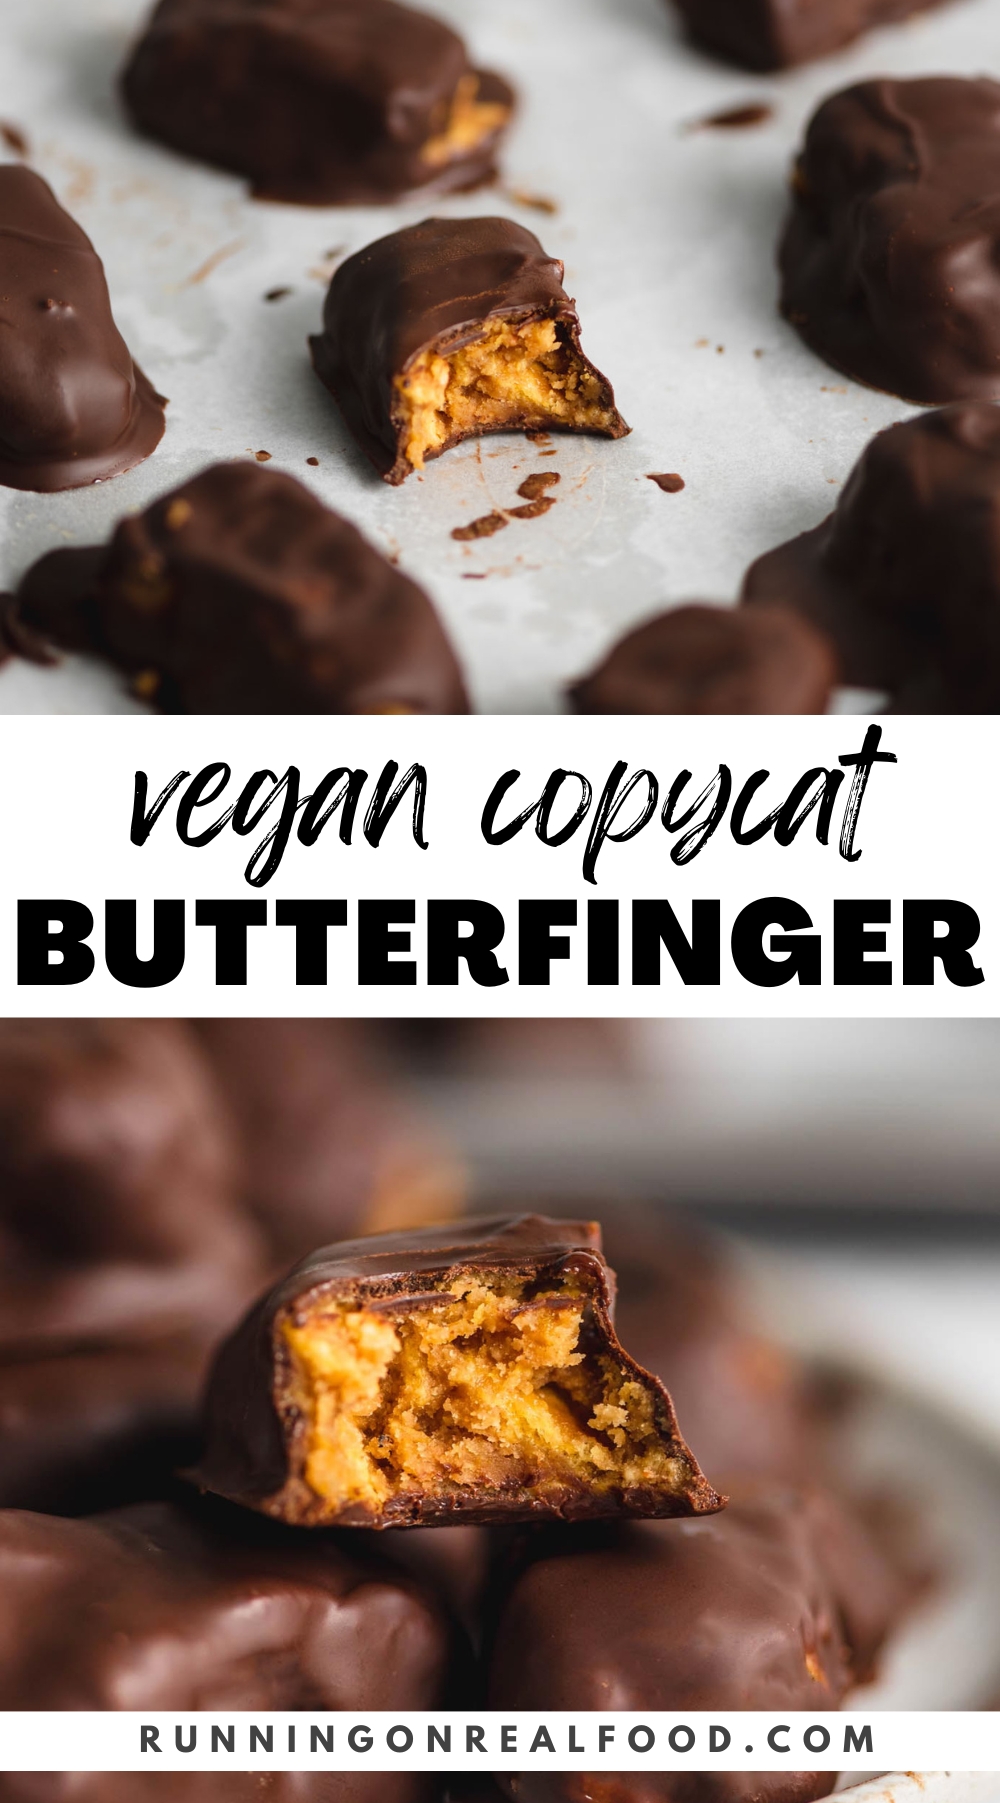
This vegan homemade Butterfingers recipe is easy to make with just corn flakes, peanut butter, chocolate and maple syrup. This recipe is made without candy corn or corn syrup and is very easy to prepare for a yummy homemade candy you’ll love!
5-Star Review
I’m already thinking of making another batch and we are not even done with the first. So good! Thank you!
Why You’ll Love Homemade Butterfingers
This is a homemade copycat recipe for vegan Butterfingers, featuring the perfect combination of crunchy corn flakes and peanut butter for an easy and delicious treat! Here’s why we love them:
- Vegan, gluten-free option, nut-free option.
- Just 4 ingredients.
- No tricky baking or candy thermometer needed.
- No candy corn or corn syrup.
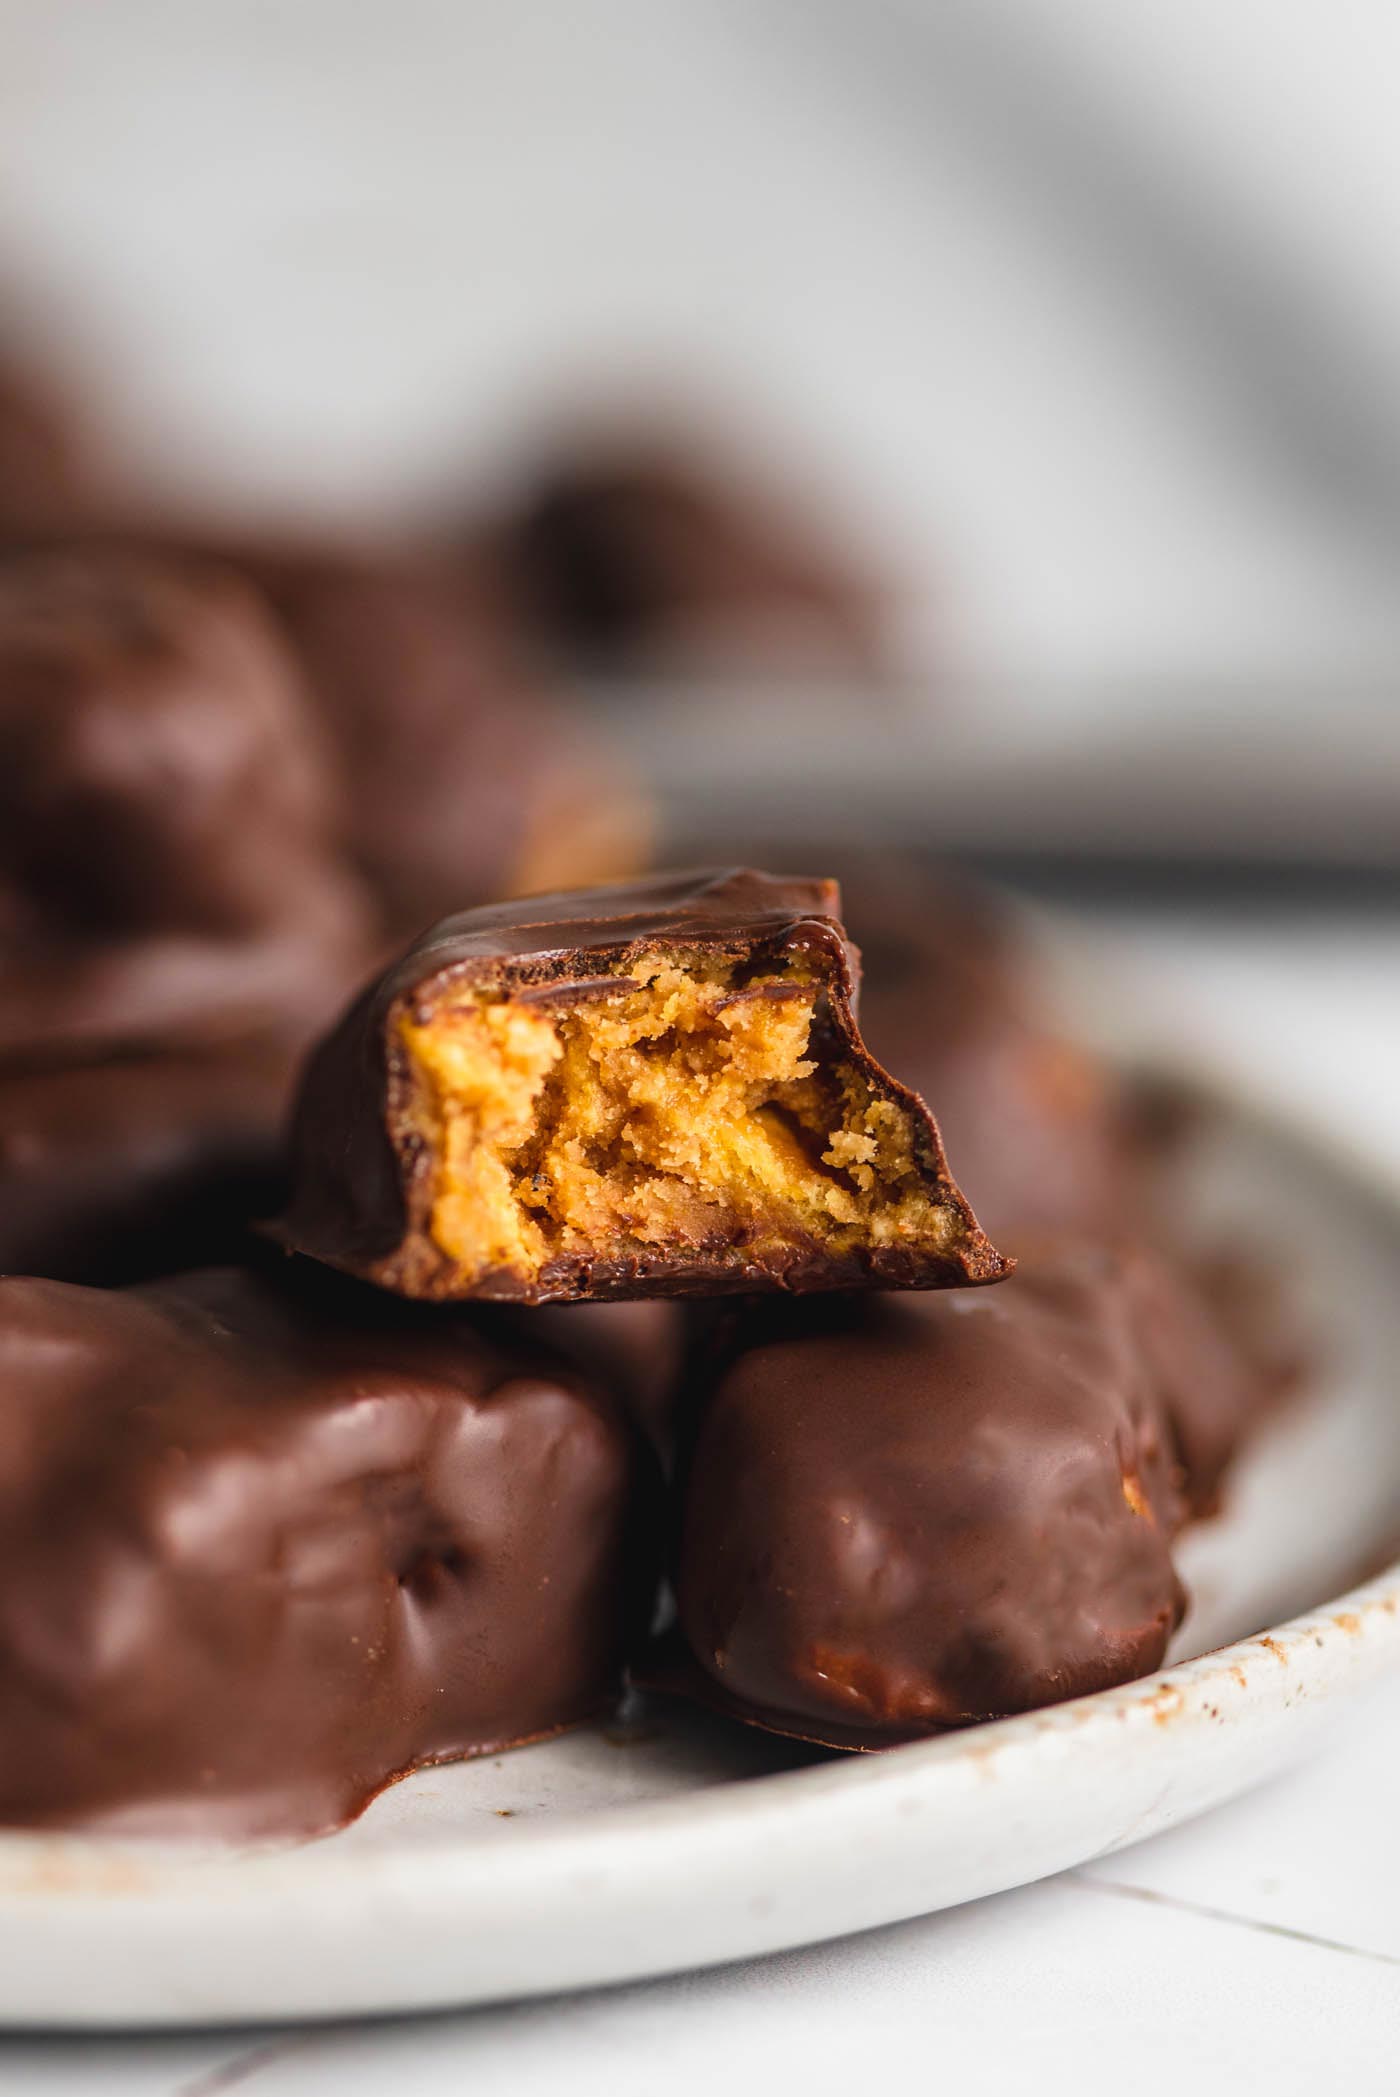
- Crunchy peanut butter and corn flake filling coated in chocolate.
- Kids love them – try them for Halloween or Easter!
- Fun and easy to make.
If you’re after more homemade candy bars, be sure to try these homemade Reese’s peanut butter eggs, homemade vegan Twix bars, homemade Mounds bars, vegan Thin Mints, and vegan Snickers bars next!
Variations and Additions
- Vanilla: I did not add vanilla extract to the recipe but you can if you like some vanilla flavour. Use 1 teaspoon.
- Roasted Peanuts: You can add up to 1/2 cup crushed roasted peanuts when you add the cornflakes, place a few on each bar before coating in chocolate or sprinkle the bars with crushed peanuts after coating in chocolate.
- Flaky Salt: Sprinkle the bars with a little flake salt after your coat them in chocolate for the perfect sweet and salty flavor.
How to Make Homemade Butterfingers with Corn Flakes
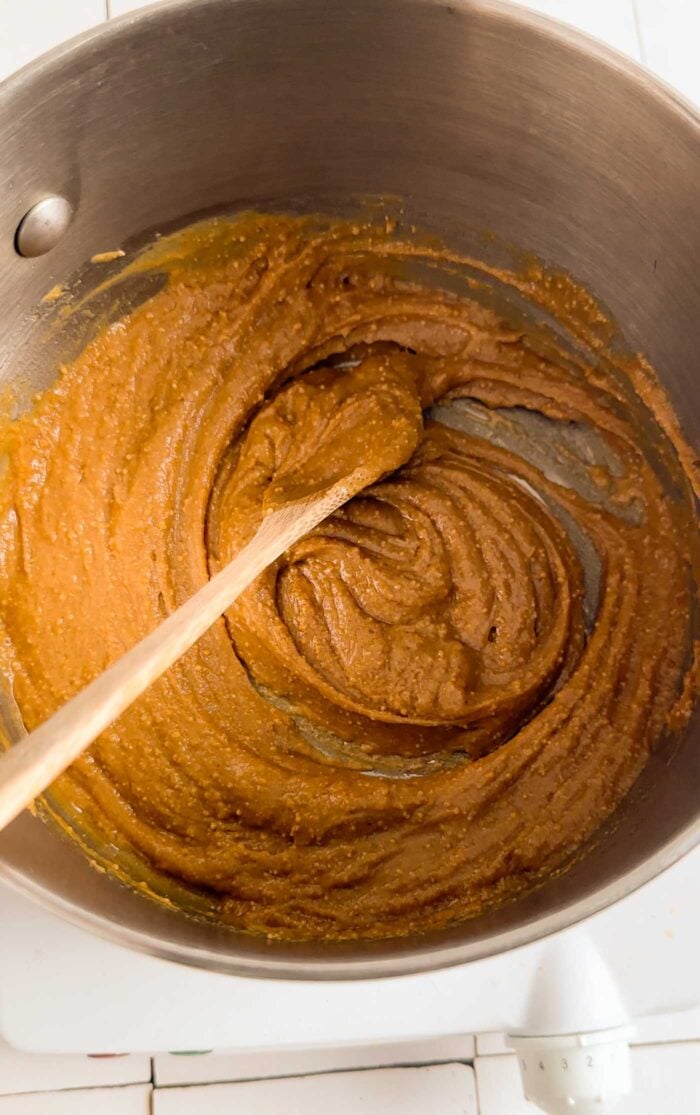
Step 1: The first step is to heat the peanut butter and maple syrup over medium-low until it comes to a very light simmer, you should see a few bubbles.
Let it cook for 2-3 minutes, stirring constantly, then remove it from the heat.
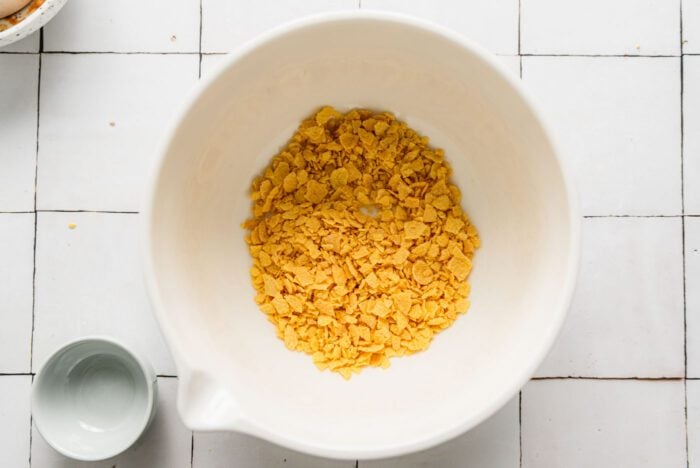
Step 2: Add the corn flakes to a mixing bowl and either slightly crush them up with your hands, a bowl or place them in a bag and slightly crush before adding them to the bowl. I just used my hands.
You don’t want to completely pulverize them. Some larger bits left behind are actually perfect for extra crunch.
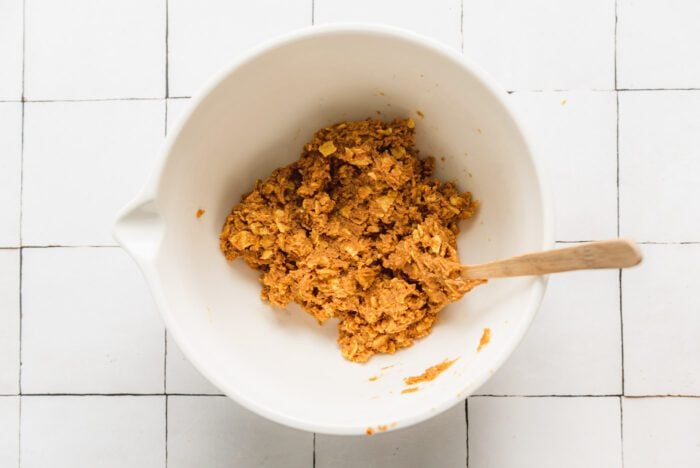
Step 3: Add the peanut butter mixture to the corn flakes and mix well to combine. Place the bowl in the fridge to chill for 15 minutes. If you want to try my nutritional yeast trick, add that now as well.
Recipe Tip
To make this recipe even easier, at this point you can press the peanut butter mixture into a loaf pan lined with parchment paper, top with melted chocolate, freeze until the chocolate has hardened then lift out of the pan, slice and enjoy. Super quick and easy!
Step 3: After nearly 15 minutes, add the chocolate chips to a microwave-safe bowl and melt in 20-second intervals, stirring in between, until completely smooth. Line a baking sheet with a piece of parchment paper as well.
Recipe Tip
I like to add 1-2 tbsp coconut oil to the chocolate to thin it out and make it easier to coat the bars. This is optional. After melting the chocolate, if it seems very thick, adding up to 2 tbsp coconut oil or vegan butter to thin.
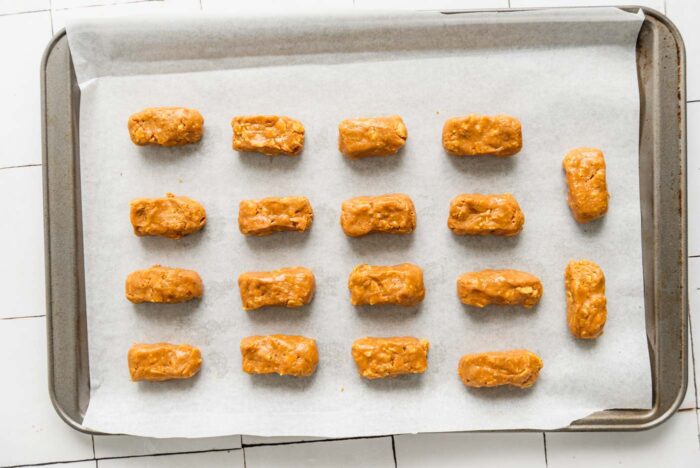
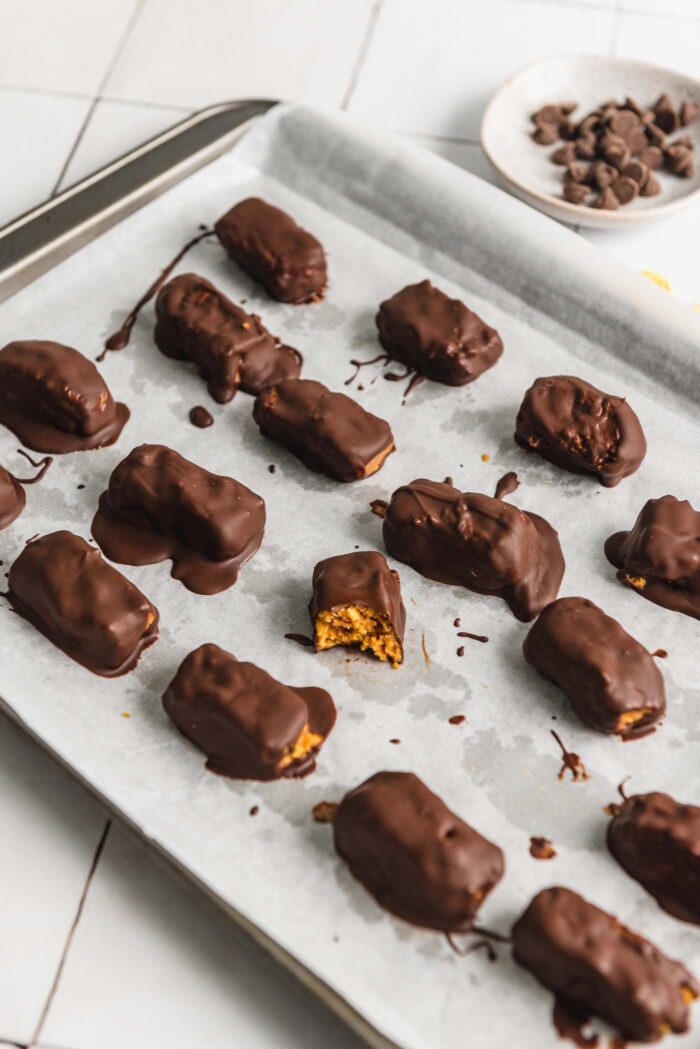
Step 4: Pull the filling from the fridge and shape about 18-20 small candy bars using about 1.5-2 tbsp of the peanut butter mixture each. Place them on the lined baking sheet.
If you have silicone molds those work well for evenly shaped candy bars.
Using a fork, dip each bar into the melted chocolate, flipping to coat all the sides, then placing back on the baking sheet.
If you have extra melted chocolate you can drizzle it over the bars for a pretty effect.
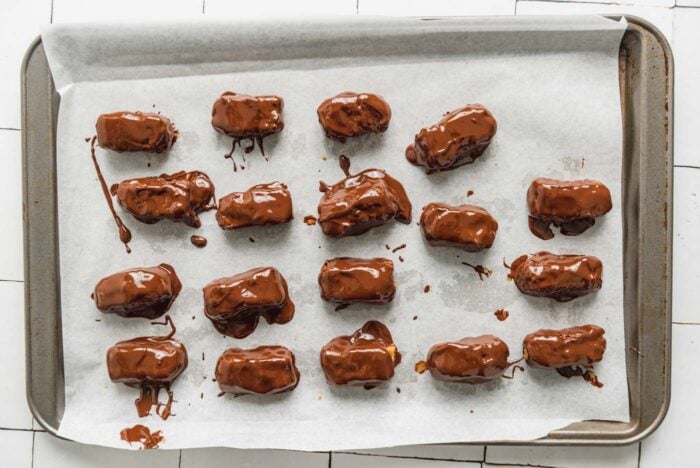
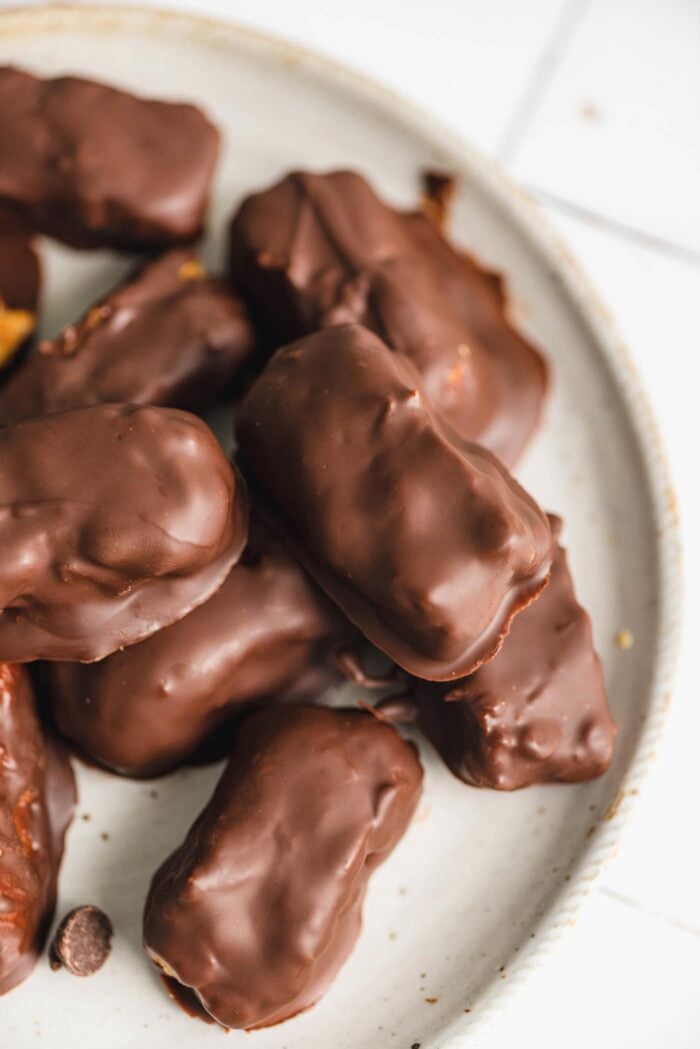
Step 4: Place the entire pan in the fridge for at least 30 minutes or until the chocolate has hardened completely. Enjoy your bars!
Deryn’s Notes
- Chocolate Coating: Adding 1-2 tbsp coconut oil or plant-based butter will thin the chocolate a bit to make it easier to coat the bars. This is optional but I find it helpful if the chocolate is too thick.
- Nutritional Yeast: This is completely optional but I like to add 2 tbsp of nutritional yeast to the peanut butter filling. This adds a salty, nutty flavour that makes it taste like Reese’s. I first used this method in my Peanut Butter Cups, then Peanut Butter Cup Shake and I know it sounds a little funny but it’s really good!
- Loaf Pan Method: For an even easier way of making these, mix up the peanut butter-corn flake mixture then firmly press into a parchment paper-lined loaf pan. Top with melted chocolate, I would use a bit less, about 2/3 cup, then freeze until the chocolate sets. Slice into 16-20 bars and enjoy!
FAQs
Butterfinger candy bars are not vegan but this homemade copycat recipe is, as long as you use dairy-free chocolate chips, dark chocolate chips or melted dark chocolate.
The recipe is gluten-free as long as you use gluten-free corn flakes. Corn flakes are naturally gluten-free but some brands, such as Kellog’s, contain malt flavour from barley, which is not safe for those with Celiac or a gluten allergy.
I used Nature’s Path Corn Flakes which are certified gluten-free.
Storage Instructions
- The bars must be stored in the fridge or freezer.
- Store in a sealed container in the fridge for up to 2 weeks or freezer for up to 3 months.
- They’re really good directly from the freezer.
- If serving, keep in the fridge or freezer until just before they’re needed as they’ll get soft at room temperature.
If you make this recipe, please consider leaving a comment and a ⭐⭐⭐⭐⭐ rating in the comment section below. It helps others who are thinking of making the recipe, and I love to hear from you. Thanks for trying my recipes! – Deryn

Homemade Butterfingers (No Candy Corn)
Ingredients
- 1 cup creamy natural peanut butter, 250g
- ⅓ cup maple syrup, 106g
- 2 cups corn flakes, slightly crushed, 90 g
- 1 cup chocolate chips, 150 g
- pinch salt, optional if peanut butter unsalted
Instructions
- Add the maple syrup and peanut butter (and salt if peanut butter is unsalted) to a small saucepan and heat over medium-low heat. Bring to a light simmer, a few bubbles should appear. Cook for 2-3 minutes, stirring constantly. Remove the pan from the heat.1 cup creamy natural peanut butter, ⅓ cup maple syrup
- Add the corn flakes to a mixing bowl and either slightly crush with your hands, the bottom of a bowl, or crush in a bag before adding to the bowl. You don't want to completely pulverize them, just break them up a bit. Some larger pieces will add more crunch to the bars.2 cups corn flakes, slightly crushed
- Add the peanut butter mixture to the corn flakes and stir to fully combine. Place the bowl in the fridge to chill for 15 minutes.
- After nearly 15 minutes, add the chocolate to a microwave-safe bowl and microwave in 20-second increments, stirring between increments, until it's completely smooth. Alternatively, use a double boiler to melt the chocolate. Line a baking sheet with parchment paper as well.1 cup chocolate chips
- Remove the bowl from the fridge and shape into 18-20 mini candy bars using about 1.5-2 tbsp per bar, placing each on the lined baking sheet.
- Use a fork to dip each bar into the melted chocolate, flipping to coat all sides, then placing back on the baking sheet. Repeat until you've coated all the bars. If you have any extra chocolate, drizzle if over any spots you may have missed on the bars.
- Place the pan in the fridge for at least 30 minutes or until the chocolate is hardened. Enjoy your bars.


This is an awesome recipe. It really tastes exactly like a butterfinger but way better
Reading through the recipe, when you mention the corn flakes etc.. You touched on how the texture will be different. If you think about it, using rice crisps will give the inside the texture of a Whatchamacallit candy bar… There’s got next idea for a copy car recipe.. And i helped lol
I’ve never tried that candy bar but sounds good to me!
I’m already thinking of making another batch and we are not even done with the first. SO GOOD! Thank you!
Haha. You’re welcome! We make these often too. So easy and yummy!
These are too good – not hard to make at all.
My creamy peanut butter had expired in 2022 – so I used the nutty natural one I had on hand and prefer anyway. I like the extra crunch! I did add the nutritional yeast – I think it makes it extra good.
Thanks Nika! Glad you liked them.
I’m giving this recipe a 5 star rating even though I have not made it yet! I need to get corn flakes and some more nutritional yeast before I can make it! Butterfingers are my favorite and a downfall for me. If my husband brings them into the house I have to eat one. And I am trying to go completely whole food plant based. I will make these soon and come back and let you know how it went!!